
Ready for reliable comfort?
Book your San Mateo County HVAC service today — fast, honest, guaranteed.
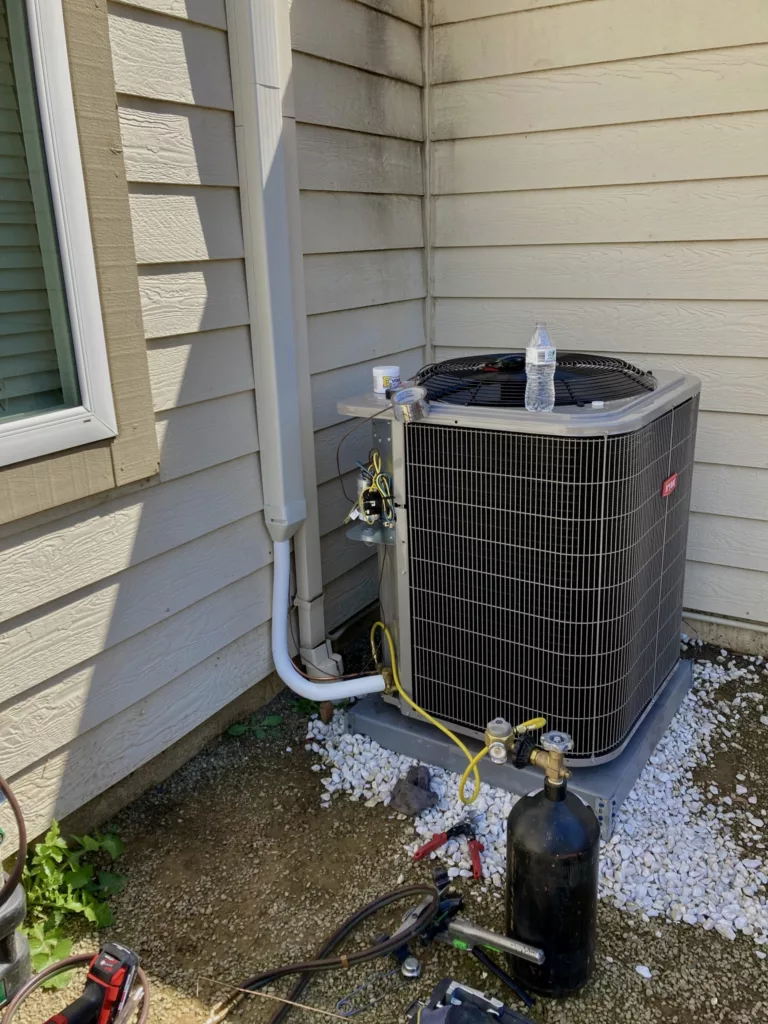
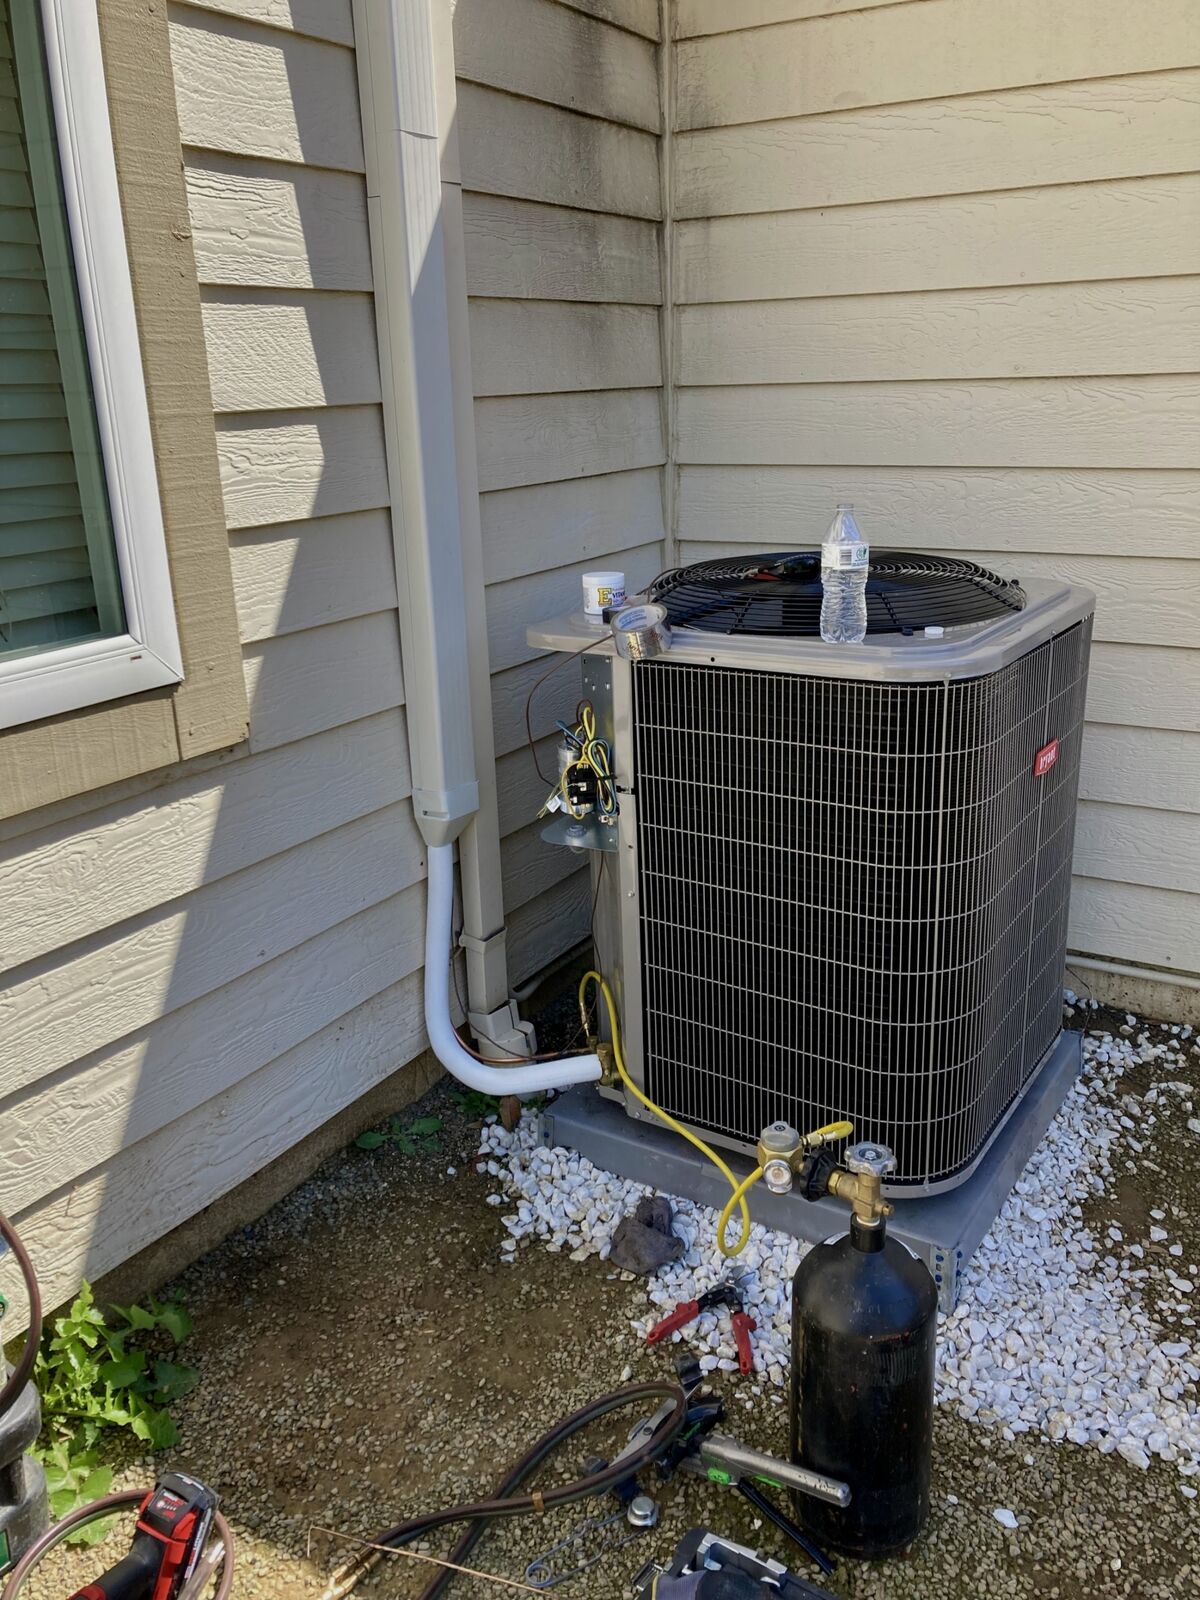
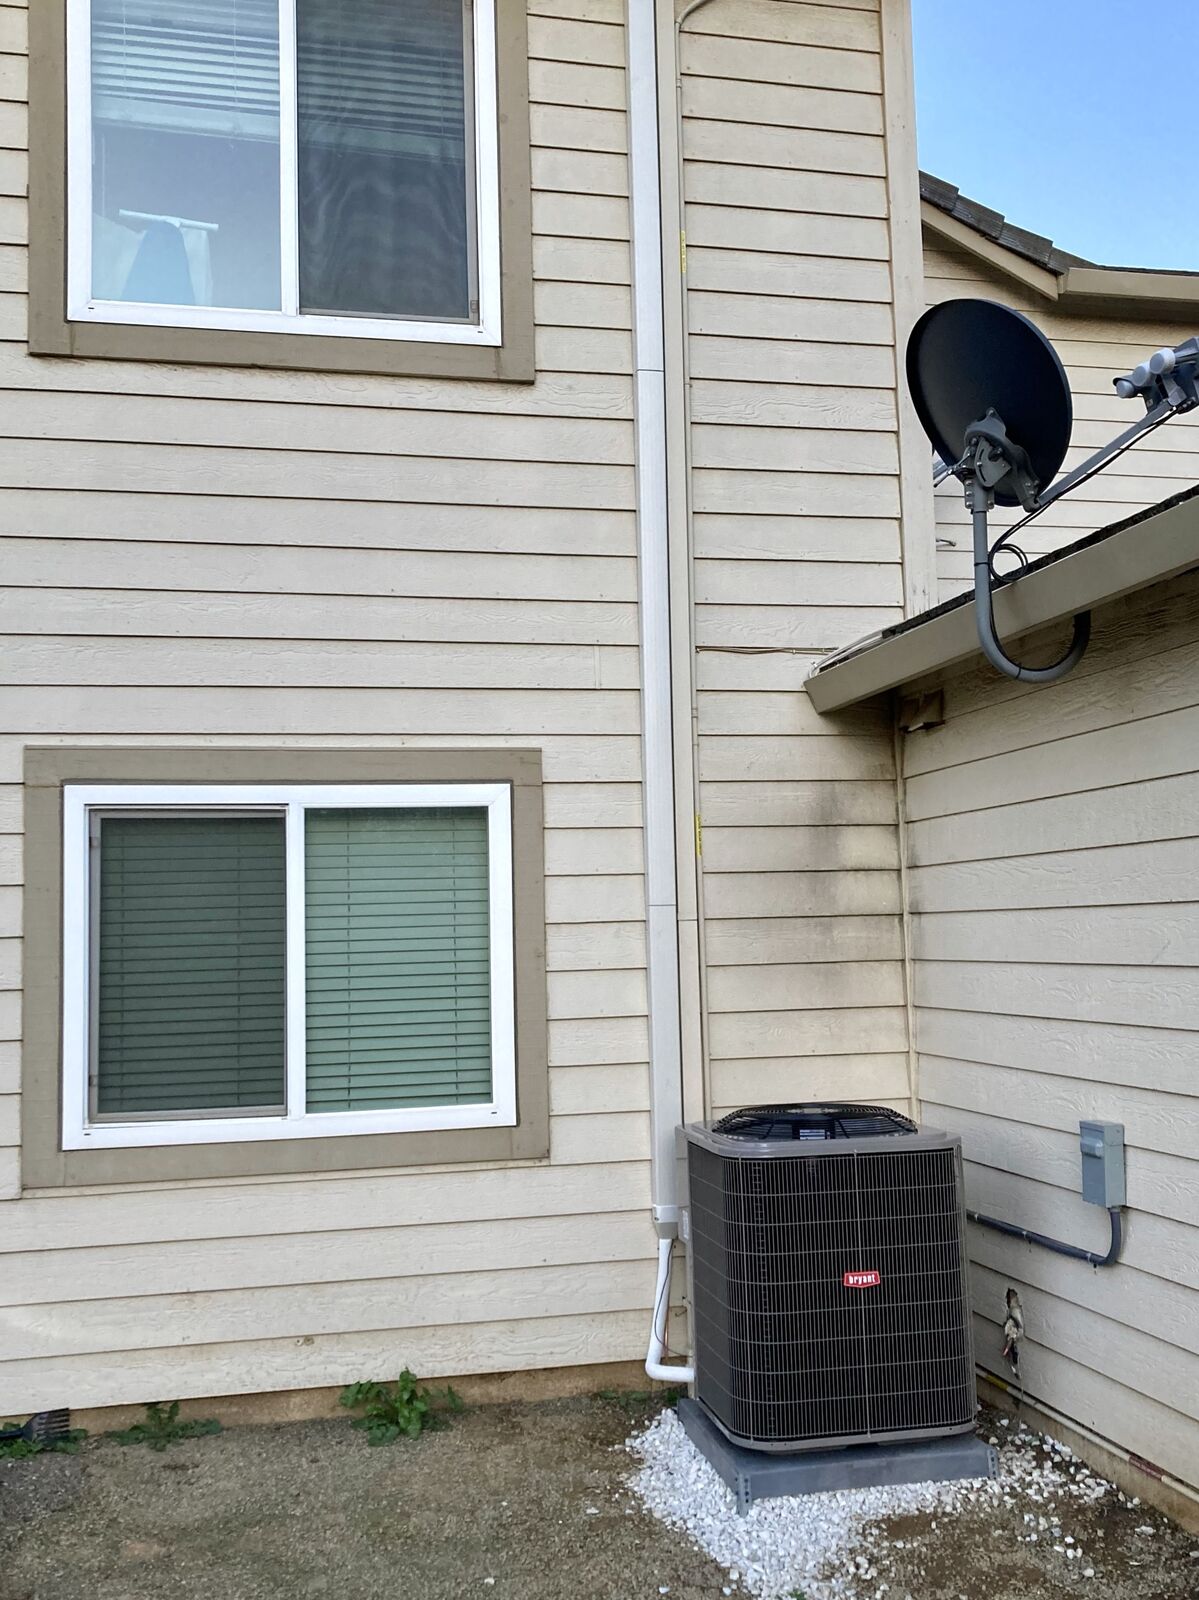
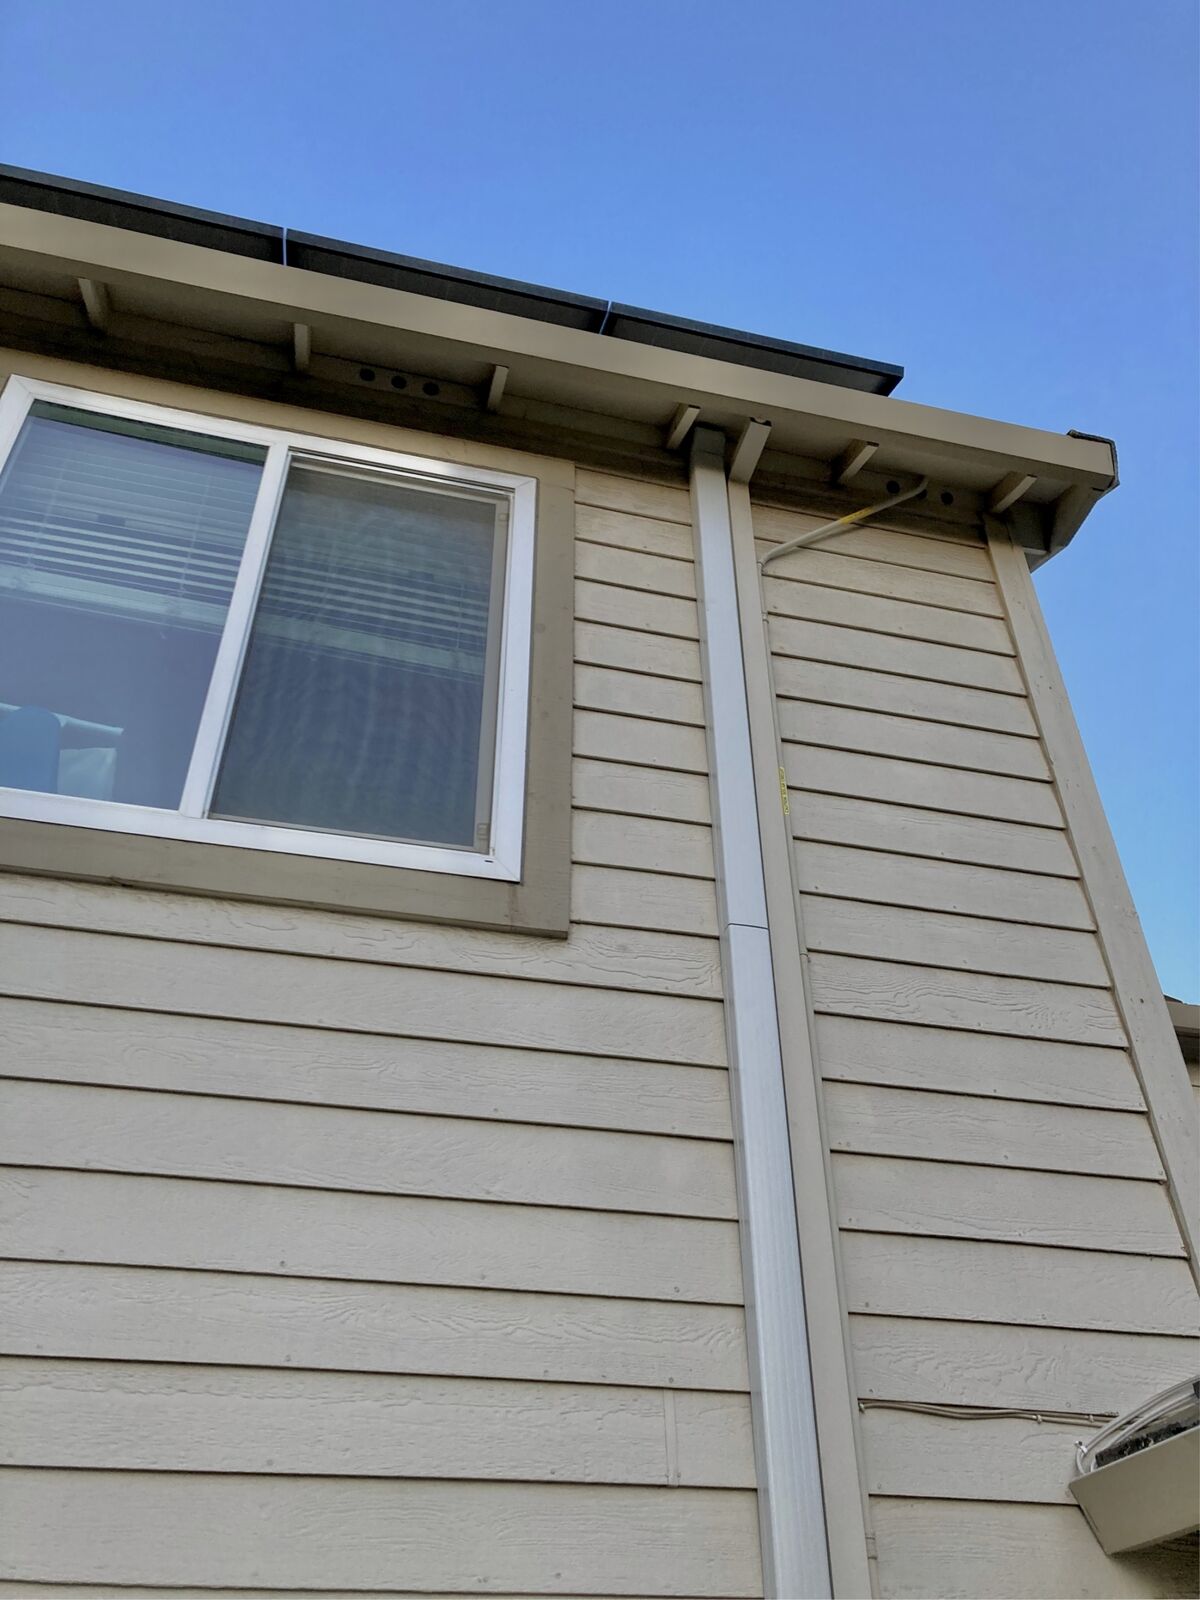
Nur HVAC completed a refrigerant line installation for an HVAC system in San Jose, CA. Running a fresh line set is a careful job: the line has to be correctly sized, routed, leak-tested, and charged before the system can cool or heat properly.
Steps in a refrigerant line installation
- Determine refrigerant type and line size: these depend on the system, including the size of the HVAC unit, the distance to the evaporator coil, and the amount of refrigerant required.
- Plan the route: the best path for the line is mapped out, along with the placement of the line set, the refrigerant metering device, and the suction line accumulator.
- Prepare the site: obstacles and debris are cleared and a level surface is created for the work.
- Install the line: the line is run from the HVAC unit to the evaporator coil, the line set is connected, and the components are fitted.
- Pressure test and vacuum: the line is filled with nitrogen and pressurized to check for leaks, then a vacuum pump pulls out air and moisture.
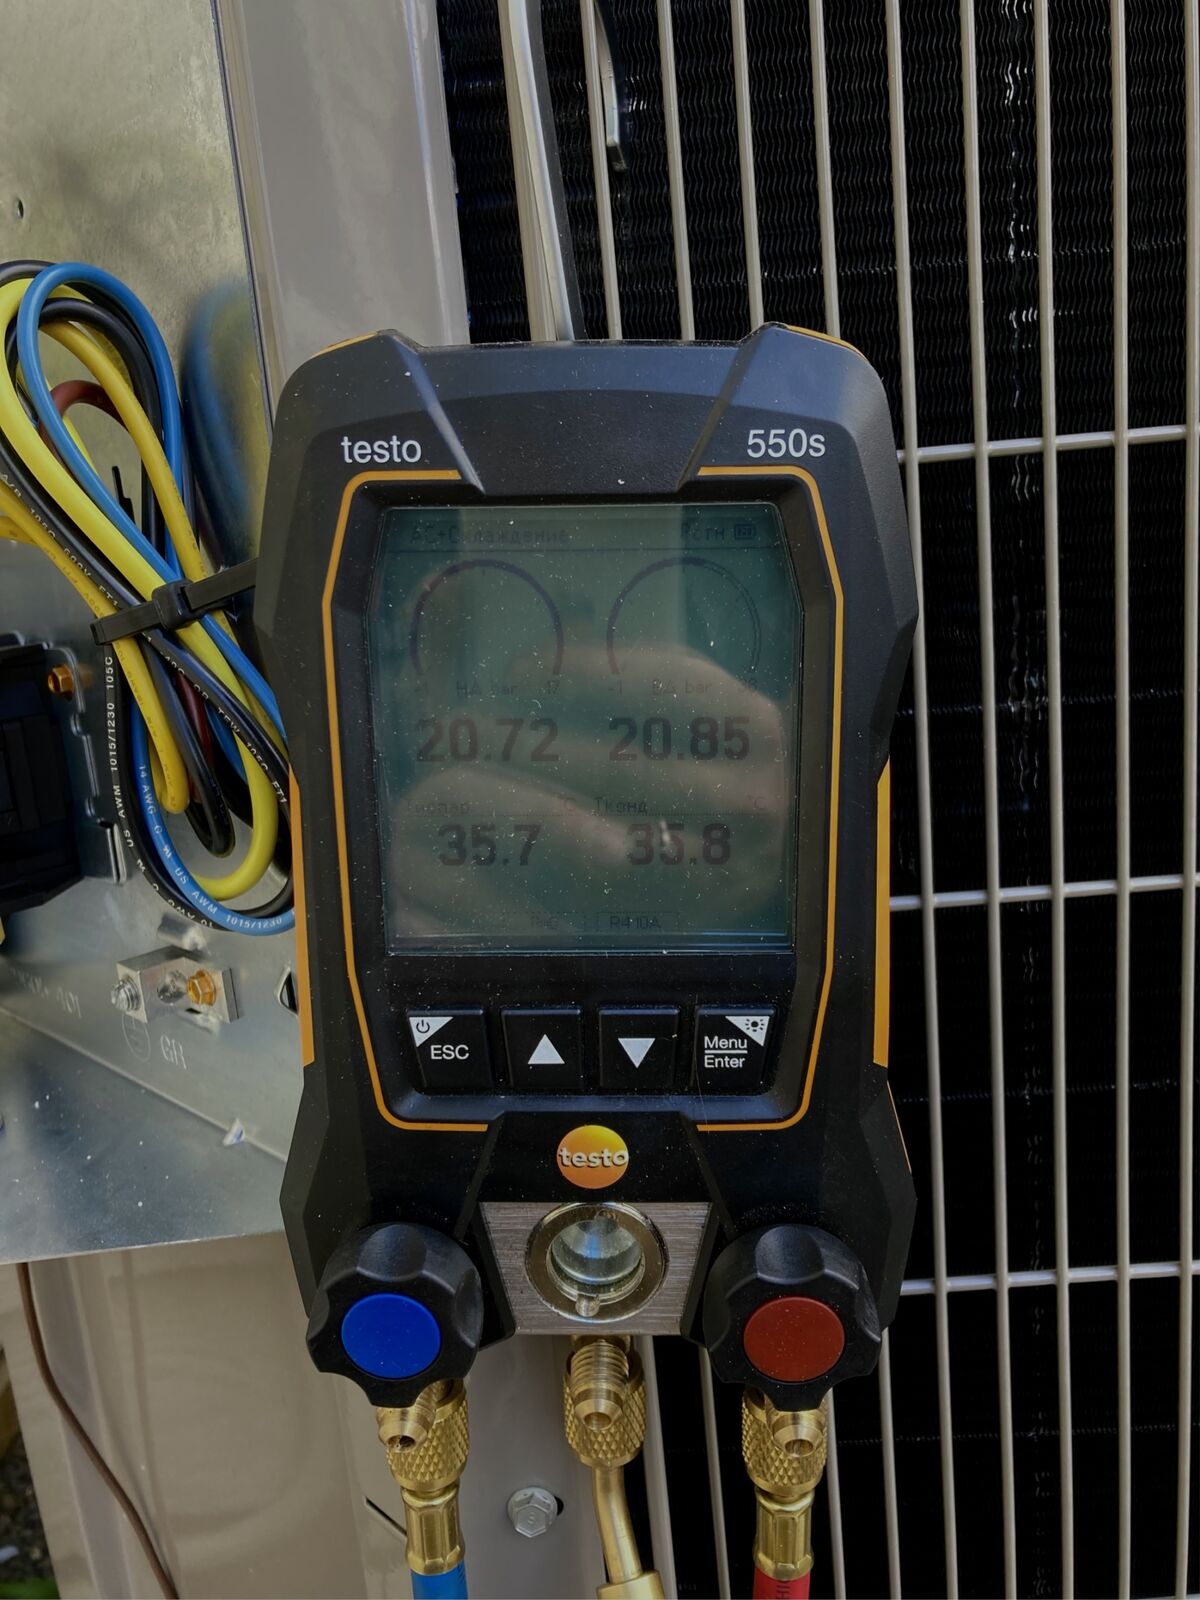
- Charge the system: the correct amount of refrigerant is added while pressure and temperature are monitored.
- Test and commission: the system is checked for leaks and verified to deliver the intended cooling or heating capacity.
The exact process can vary with the system and with local building codes. Nur HVAC handles each refrigerant line install to code, leak-tests the connections, and confirms the system performs correctly before finishing.
Why proper line work matters
A refrigerant line that is poorly sized, kinked, or contaminated with moisture will quietly drag down the whole system: cooling capacity drops, the compressor works harder, and the equipment wears out sooner. Careful line work is one of the less visible parts of a quality job, but it directly affects how well the system performs for years. If your system needs new lines or a full setup, see our HVAC installation service.
Questions about your HVAC?
Talk to a real San Mateo County technician — free estimates, honest advice, no pressure.
Reviews
Trusted by your neighbors


“I highly recommend NUR HVAC to install or replace your old system. We had our 2 HVAC systems replaced with heat pump systems. Since we have solar installed on our roof, we opted for the Carrier heat pumps and new air handlers which don't use natural gas for heat. Their installers were always on time and cleaned up after each day of work. They arranged for the permit and scheduled final inspection. A very nice job and respectful staff!!”

“I am happy to do business with Nur HVAC. They have an excellent phone service. Regina, who I talked to on the phone regarding my central heating problem, and she was very courteous, and helpful. Adlan did a thorough job to make sure that my central heating system worked properly before he left. I am very happy with their services. Thanks guys for the great service you have provided to me. Keep up with your great work”

“Our family is really pleased with the service NUR HVAC provided in recent months. They answered our calls and provided the repair service on the same day. Their technicians are courteous, professional, and knowledgeable . NUR HVAC has a great team where they work together efficiently, and provided reliable service, thus they are truly a Five Stars review company.”

“I've worked with Nur multiple times, specifically Fedor and Alex. They do a great job and are thorough. It's great to be able to switch from a gas furnace to a heat pump, which means we have A/C now too! They also installed a new thermostat and put more insulation around exterior ducting. They reply quickly and are polite. I've also seen them doing commercial HVAC systems so they are trusted by businesses too.”

“Their installation is very professional. And they would like to respond to your additional questions and provide solutions for it. Good communication and good work.”
“Nur HVAC was very easy to communicate with and professional. Hugh praise to technician Adlan, who is knowledgeable and familiar with our apartment building. He promptly fixed the ac issue the same day as the diagnosis and went above and beyond to also help with the heating issue on a follow up visit. Would recommend this company to anybody in the bay area looking for hvac help.”

“I found this company via Yelp a few days ago. They responded immediately to my needs with clear communication and prompt scheduling through Yelp messaging. This morning, their tech alerted me 30 minutes before arrival and completed the repair within an hour, diagnosing the issue and error messages. I needed to replace my thermostat (which was an old Honeywell approximately 35 years old!) They installed a new Honeywell and it's working great.”
“Called because my commercial AC stopped blowing cold air. Was able to get an appointment for the next day. Got a message that Islam was en route. When he arrived he was very courteous and was able to change out the capacitor and get it working right away. Prices seemed fair, as well. I will definitely use them in the future for repairs and maintenance.”

“NUR replaced my very old AC with a new heat pump, and I am very pleased with their work. Their attention to detail stands out. The project manager, Fidor, communicates clearly about options that I have, and the engineer, Shilai, is skilled and hardworking. They care deeply about doing things the right way, not just getting the job done quickly. They replaced sections of piping that could affect system quality and relocated equipment to make space for the new unit, without additional charges. The insulation and pipe organization are professional and precise. Comparing side by side the new equipment installed with the old crap that the house had previous, you can easily tell the difference in quality. I appreciate how they handled the small things like removing old nails, tidying cables, and keeping the installation clean and well-organized. These are not required steps by code or in job description, but they did them anyway because they take pride in their work. They also avoid putting unnecessary ugly stickers on your equipment, which is a bonus. They may not focus much on sales presentations, but their workmanship speaks for itself. As an engineer myself, I value their straightforward, high-quality approach.”

“Nur HVAC installed a dual-system heat pump for us (unit on the ground floor and another upstairs) a few months ago. We would highly recommend them for the quality of work at a competitive cost. The system has been working very well.”
“I do not review many companies. However, NUR did such an exceptional job installing a heat pump at my house they rate a compliment. The installers were diligent, neat, on time and polite. They solved several installation problems. An excellent company to get a heat pump from. Chris”

“My family recently hired Nur HVAC to help us install HVAC system in our house, and had a great experience with them. Ilias came by the house and was...”
“I highly recommend NUR HVAC to install or replace your old system. We had our 2 HVAC systems replaced with heat pump systems. Since we have solar installed on our roof, we opted for the Carrier heat pumps and new air handlers which don't use natural gas for heat. Their installers were always on time and cleaned up after each day of work. They arranged for the permit and scheduled final inspection. A very nice job and respectful staff!!”
“I am happy to do business with Nur HVAC. They have an excellent phone service. Regina, who I talked to on the phone regarding my central heating problem, and she was very courteous, and helpful. Adlan did a thorough job to make sure that my central heating system worked properly before he left. I am very happy with their services. Thanks guys for the great service you have provided to me. Keep up with your great work”
“Our family is really pleased with the service NUR HVAC provided in recent months. They answered our calls and provided the repair service on the same day. Their technicians are courteous, professional, and knowledgeable . NUR HVAC has a great team where they work together efficiently, and provided reliable service, thus they are truly a Five Stars review company.”
“I've worked with Nur multiple times, specifically Fedor and Alex. They do a great job and are thorough. It's great to be able to switch from a gas furnace to a heat pump, which means we have A/C now too! They also installed a new thermostat and put more insulation around exterior ducting. They reply quickly and are polite. I've also seen them doing commercial HVAC systems so they are trusted by businesses too.”
“Their installation is very professional. And they would like to respond to your additional questions and provide solutions for it. Good communication and good work.”
“Nur HVAC was very easy to communicate with and professional. Hugh praise to technician Adlan, who is knowledgeable and familiar with our apartment building. He promptly fixed the ac issue the same day as the diagnosis and went above and beyond to also help with the heating issue on a follow up visit. Would recommend this company to anybody in the bay area looking for hvac help.”
“I found this company via Yelp a few days ago. They responded immediately to my needs with clear communication and prompt scheduling through Yelp messaging. This morning, their tech alerted me 30 minutes before arrival and completed the repair within an hour, diagnosing the issue and error messages. I needed to replace my thermostat (which was an old Honeywell approximately 35 years old!) They installed a new Honeywell and it's working great.”
“Called because my commercial AC stopped blowing cold air. Was able to get an appointment for the next day. Got a message that Islam was en route. When he arrived he was very courteous and was able to change out the capacitor and get it working right away. Prices seemed fair, as well. I will definitely use them in the future for repairs and maintenance.”
“NUR replaced my very old AC with a new heat pump, and I am very pleased with their work. Their attention to detail stands out. The project manager, Fidor, communicates clearly about options that I have, and the engineer, Shilai, is skilled and hardworking. They care deeply about doing things the right way, not just getting the job done quickly. They replaced sections of piping that could affect system quality and relocated equipment to make space for the new unit, without additional charges. The insulation and pipe organization are professional and precise. Comparing side by side the new equipment installed with the old crap that the house had previous, you can easily tell the difference in quality. I appreciate how they handled the small things like removing old nails, tidying cables, and keeping the installation clean and well-organized. These are not required steps by code or in job description, but they did them anyway because they take pride in their work. They also avoid putting unnecessary ugly stickers on your equipment, which is a bonus. They may not focus much on sales presentations, but their workmanship speaks for itself. As an engineer myself, I value their straightforward, high-quality approach.”
“Nur HVAC installed a dual-system heat pump for us (unit on the ground floor and another upstairs) a few months ago. We would highly recommend them for the quality of work at a competitive cost. The system has been working very well.”
“I do not review many companies. However, NUR did such an exceptional job installing a heat pump at my house they rate a compliment. The installers were diligent, neat, on time and polite. They solved several installation problems. An excellent company to get a heat pump from. Chris”
“My family recently hired Nur HVAC to help us install HVAC system in our house, and had a great experience with them. Ilias came by the house and was...”
“I highly recommend NUR HVAC to install or replace your old system. We had our 2 HVAC systems replaced with heat pump systems. Since we have solar installed on our roof, we opted for the Carrier heat pumps and new air handlers which don't use natural gas for heat. Their installers were always on time and cleaned up after each day of work. They arranged for the permit and scheduled final inspection. A very nice job and respectful staff!!”
“I am happy to do business with Nur HVAC. They have an excellent phone service. Regina, who I talked to on the phone regarding my central heating problem, and she was very courteous, and helpful. Adlan did a thorough job to make sure that my central heating system worked properly before he left. I am very happy with their services. Thanks guys for the great service you have provided to me. Keep up with your great work”
“Our family is really pleased with the service NUR HVAC provided in recent months. They answered our calls and provided the repair service on the same day. Their technicians are courteous, professional, and knowledgeable . NUR HVAC has a great team where they work together efficiently, and provided reliable service, thus they are truly a Five Stars review company.”
“I've worked with Nur multiple times, specifically Fedor and Alex. They do a great job and are thorough. It's great to be able to switch from a gas furnace to a heat pump, which means we have A/C now too! They also installed a new thermostat and put more insulation around exterior ducting. They reply quickly and are polite. I've also seen them doing commercial HVAC systems so they are trusted by businesses too.”
“Their installation is very professional. And they would like to respond to your additional questions and provide solutions for it. Good communication and good work.”
“Nur HVAC was very easy to communicate with and professional. Hugh praise to technician Adlan, who is knowledgeable and familiar with our apartment building. He promptly fixed the ac issue the same day as the diagnosis and went above and beyond to also help with the heating issue on a follow up visit. Would recommend this company to anybody in the bay area looking for hvac help.”
“I found this company via Yelp a few days ago. They responded immediately to my needs with clear communication and prompt scheduling through Yelp messaging. This morning, their tech alerted me 30 minutes before arrival and completed the repair within an hour, diagnosing the issue and error messages. I needed to replace my thermostat (which was an old Honeywell approximately 35 years old!) They installed a new Honeywell and it's working great.”
“Called because my commercial AC stopped blowing cold air. Was able to get an appointment for the next day. Got a message that Islam was en route. When he arrived he was very courteous and was able to change out the capacitor and get it working right away. Prices seemed fair, as well. I will definitely use them in the future for repairs and maintenance.”
“NUR replaced my very old AC with a new heat pump, and I am very pleased with their work. Their attention to detail stands out. The project manager, Fidor, communicates clearly about options that I have, and the engineer, Shilai, is skilled and hardworking. They care deeply about doing things the right way, not just getting the job done quickly. They replaced sections of piping that could affect system quality and relocated equipment to make space for the new unit, without additional charges. The insulation and pipe organization are professional and precise. Comparing side by side the new equipment installed with the old crap that the house had previous, you can easily tell the difference in quality. I appreciate how they handled the small things like removing old nails, tidying cables, and keeping the installation clean and well-organized. These are not required steps by code or in job description, but they did them anyway because they take pride in their work. They also avoid putting unnecessary ugly stickers on your equipment, which is a bonus. They may not focus much on sales presentations, but their workmanship speaks for itself. As an engineer myself, I value their straightforward, high-quality approach.”
“Nur HVAC installed a dual-system heat pump for us (unit on the ground floor and another upstairs) a few months ago. We would highly recommend them for the quality of work at a competitive cost. The system has been working very well.”
“I do not review many companies. However, NUR did such an exceptional job installing a heat pump at my house they rate a compliment. The installers were diligent, neat, on time and polite. They solved several installation problems. An excellent company to get a heat pump from. Chris”
“My family recently hired Nur HVAC to help us install HVAC system in our house, and had a great experience with them. Ilias came by the house and was...”
Google Reviews
What our customers say on Google

“I highly recommend Nur HVAC! They upgraded my old split furnace HVAC with a heat pump HVAC retrofit. Fedor and the installation team showed outstanding professionalism and craftsmanship in all phases of the project: * Detailed initial project scoping tailored to my home's needs * Fast, friendly communication from start to finish * Solved new complexities we encountered on site * Collaboratively discussed alternative solutions, never felt pushy * High work quality I would absolutely choose Nur again for future HVAC work.”

“Fedor and the team were great! Very professional and great communication.”

“Our team was meticulous with installation of a new AC system. The communication with the whole team from the office to the installers was clear, helpful and timely. They take great pride in their work and are professional and easy to work with. We highly recommend Nur.”

“From appointment making to resolution of A/C issue the service was fantastic.”

“Adlan is a pleasure to work with. He's knowledgeable and clearly tries to do the best, most effective repair for the lowest cost.”

“With summers getting hotter every year, we finally decided to seek out someone to install an AC system. We opted to get everything done in one go, so we replaced an outdated furnace, installed new air ducts & vents, and decided on an efficient A/C unit. Nur HVAC was reasonably priced, not the most expensive, not the cheapest, but had the best communication, clear outline on the work being done, and the actual workmanship of the install was very professional. Very happy we went with this company. The attention to detail was top notch, service was friendly, and the equipment is so quiet we barely notice it when it's on. Only regret is not having done it sooner.”

“I used Nur to install a new heat pump and they were terrific. I sought quotes from a number of competitors. Not only were they competitively priced but they have been super responsive and professional throughout. Fedor patiently and thoroughly responded to every question that ChatGPT could throw at him (through me)! The installation team - Alex and Vadim - were awesome and worked went above and beyond.”

“The service was prompt and the HVAC system was quickly repaired. While repairing the HVAC, we had our heater serviced. Both were reasonably priced and no attempts were made to upsell additional services. Bottom line, we will use their services in the future.”

“Great job by the team on two new Mitsubishi systems!”

“Adlan just completed a full residential furnace and a/c system maintenance. Happy to say he performed a very thorough job. He diagnosed and fixed a dead vent. All proper measurements were taken and he dug in deep to check all the components. 100% happy with the service.”

“They are very professional and experienced. I looked around a lot. this company gave me the best price for new install. I was waiting to find something wrong with their install or the system, but they brought a brand new system, and did a great job on installation as well. So i won in every direction. I give Arthur 10.”

“I had my 40 year old gas furnace and 30 year old central air cooler removed and replaced with all new heat pump system that also qualifies for a SVCE rebate! NUR HVAC’s cost estimate was comparable to their competitors, they were responsive to my needs for scheduling, friendly and easy to work with. I would highly recommend them!”

“Great work on a difficult problem Replacement of faulty unit in a condo complex”

“Great communication. Needed a couple of visits to fix but stuck with it until the job was done.”

“Loved my technician. Very honest.”

“Great communication and expert team”

“Amazing quality of commitment, service, and communication. Would highly recommend this company!”

“nice guy, on time, did maint, no ripoffs, laid back, will use again. Excellent price.”

“Very knowledgable and provided great recommendations”

“Islam is very knowledgeable, patient and a diligent professional. Thanks Islam!”

“Responsive and professional. Great job.”

“Islan diagnosed system. Needs to order parts and return for repairs”

“Aldan is knowledgeable and very helpful. He came on time and did a thorough job. He explains every steps and future plans”

“Alexey was on time, very courteous and thorough. He solved the problem. AC works again.”
“I highly recommend Nur HVAC! They upgraded my old split furnace HVAC with a heat pump HVAC retrofit. Fedor and the installation team showed outstanding professionalism and craftsmanship in all phases of the project: * Detailed initial project scoping tailored to my home's needs * Fast, friendly communication from start to finish * Solved new complexities we encountered on site * Collaboratively discussed alternative solutions, never felt pushy * High work quality I would absolutely choose Nur again for future HVAC work.”
“Fedor and the team were great! Very professional and great communication.”
“Our team was meticulous with installation of a new AC system. The communication with the whole team from the office to the installers was clear, helpful and timely. They take great pride in their work and are professional and easy to work with. We highly recommend Nur.”
“From appointment making to resolution of A/C issue the service was fantastic.”
“Adlan is a pleasure to work with. He's knowledgeable and clearly tries to do the best, most effective repair for the lowest cost.”
“With summers getting hotter every year, we finally decided to seek out someone to install an AC system. We opted to get everything done in one go, so we replaced an outdated furnace, installed new air ducts & vents, and decided on an efficient A/C unit. Nur HVAC was reasonably priced, not the most expensive, not the cheapest, but had the best communication, clear outline on the work being done, and the actual workmanship of the install was very professional. Very happy we went with this company. The attention to detail was top notch, service was friendly, and the equipment is so quiet we barely notice it when it's on. Only regret is not having done it sooner.”
“I used Nur to install a new heat pump and they were terrific. I sought quotes from a number of competitors. Not only were they competitively priced but they have been super responsive and professional throughout. Fedor patiently and thoroughly responded to every question that ChatGPT could throw at him (through me)! The installation team - Alex and Vadim - were awesome and worked went above and beyond.”
“The service was prompt and the HVAC system was quickly repaired. While repairing the HVAC, we had our heater serviced. Both were reasonably priced and no attempts were made to upsell additional services. Bottom line, we will use their services in the future.”
“Great job by the team on two new Mitsubishi systems!”
“Adlan just completed a full residential furnace and a/c system maintenance. Happy to say he performed a very thorough job. He diagnosed and fixed a dead vent. All proper measurements were taken and he dug in deep to check all the components. 100% happy with the service.”
“They are very professional and experienced. I looked around a lot. this company gave me the best price for new install. I was waiting to find something wrong with their install or the system, but they brought a brand new system, and did a great job on installation as well. So i won in every direction. I give Arthur 10.”
“I had my 40 year old gas furnace and 30 year old central air cooler removed and replaced with all new heat pump system that also qualifies for a SVCE rebate! NUR HVAC’s cost estimate was comparable to their competitors, they were responsive to my needs for scheduling, friendly and easy to work with. I would highly recommend them!”
“Great work on a difficult problem Replacement of faulty unit in a condo complex”
“Great communication. Needed a couple of visits to fix but stuck with it until the job was done.”
“Loved my technician. Very honest.”
“Great communication and expert team”
“Amazing quality of commitment, service, and communication. Would highly recommend this company!”
“nice guy, on time, did maint, no ripoffs, laid back, will use again. Excellent price.”
“Very knowledgable and provided great recommendations”
“Islam is very knowledgeable, patient and a diligent professional. Thanks Islam!”
“Responsive and professional. Great job.”
“Islan diagnosed system. Needs to order parts and return for repairs”
“Aldan is knowledgeable and very helpful. He came on time and did a thorough job. He explains every steps and future plans”
“Alexey was on time, very courteous and thorough. He solved the problem. AC works again.”
“I highly recommend Nur HVAC! They upgraded my old split furnace HVAC with a heat pump HVAC retrofit. Fedor and the installation team showed outstanding professionalism and craftsmanship in all phases of the project: * Detailed initial project scoping tailored to my home's needs * Fast, friendly communication from start to finish * Solved new complexities we encountered on site * Collaboratively discussed alternative solutions, never felt pushy * High work quality I would absolutely choose Nur again for future HVAC work.”
“Fedor and the team were great! Very professional and great communication.”
“Our team was meticulous with installation of a new AC system. The communication with the whole team from the office to the installers was clear, helpful and timely. They take great pride in their work and are professional and easy to work with. We highly recommend Nur.”
“From appointment making to resolution of A/C issue the service was fantastic.”
“Adlan is a pleasure to work with. He's knowledgeable and clearly tries to do the best, most effective repair for the lowest cost.”
“With summers getting hotter every year, we finally decided to seek out someone to install an AC system. We opted to get everything done in one go, so we replaced an outdated furnace, installed new air ducts & vents, and decided on an efficient A/C unit. Nur HVAC was reasonably priced, not the most expensive, not the cheapest, but had the best communication, clear outline on the work being done, and the actual workmanship of the install was very professional. Very happy we went with this company. The attention to detail was top notch, service was friendly, and the equipment is so quiet we barely notice it when it's on. Only regret is not having done it sooner.”
“I used Nur to install a new heat pump and they were terrific. I sought quotes from a number of competitors. Not only were they competitively priced but they have been super responsive and professional throughout. Fedor patiently and thoroughly responded to every question that ChatGPT could throw at him (through me)! The installation team - Alex and Vadim - were awesome and worked went above and beyond.”
“The service was prompt and the HVAC system was quickly repaired. While repairing the HVAC, we had our heater serviced. Both were reasonably priced and no attempts were made to upsell additional services. Bottom line, we will use their services in the future.”
“Great job by the team on two new Mitsubishi systems!”
“Adlan just completed a full residential furnace and a/c system maintenance. Happy to say he performed a very thorough job. He diagnosed and fixed a dead vent. All proper measurements were taken and he dug in deep to check all the components. 100% happy with the service.”
“They are very professional and experienced. I looked around a lot. this company gave me the best price for new install. I was waiting to find something wrong with their install or the system, but they brought a brand new system, and did a great job on installation as well. So i won in every direction. I give Arthur 10.”
“I had my 40 year old gas furnace and 30 year old central air cooler removed and replaced with all new heat pump system that also qualifies for a SVCE rebate! NUR HVAC’s cost estimate was comparable to their competitors, they were responsive to my needs for scheduling, friendly and easy to work with. I would highly recommend them!”
“Great work on a difficult problem Replacement of faulty unit in a condo complex”
“Great communication. Needed a couple of visits to fix but stuck with it until the job was done.”
“Loved my technician. Very honest.”
“Great communication and expert team”
“Amazing quality of commitment, service, and communication. Would highly recommend this company!”
“nice guy, on time, did maint, no ripoffs, laid back, will use again. Excellent price.”
“Very knowledgable and provided great recommendations”
“Islam is very knowledgeable, patient and a diligent professional. Thanks Islam!”
“Responsive and professional. Great job.”
“Islan diagnosed system. Needs to order parts and return for repairs”
“Aldan is knowledgeable and very helpful. He came on time and did a thorough job. He explains every steps and future plans”
“Alexey was on time, very courteous and thorough. He solved the problem. AC works again.”
More from our blog

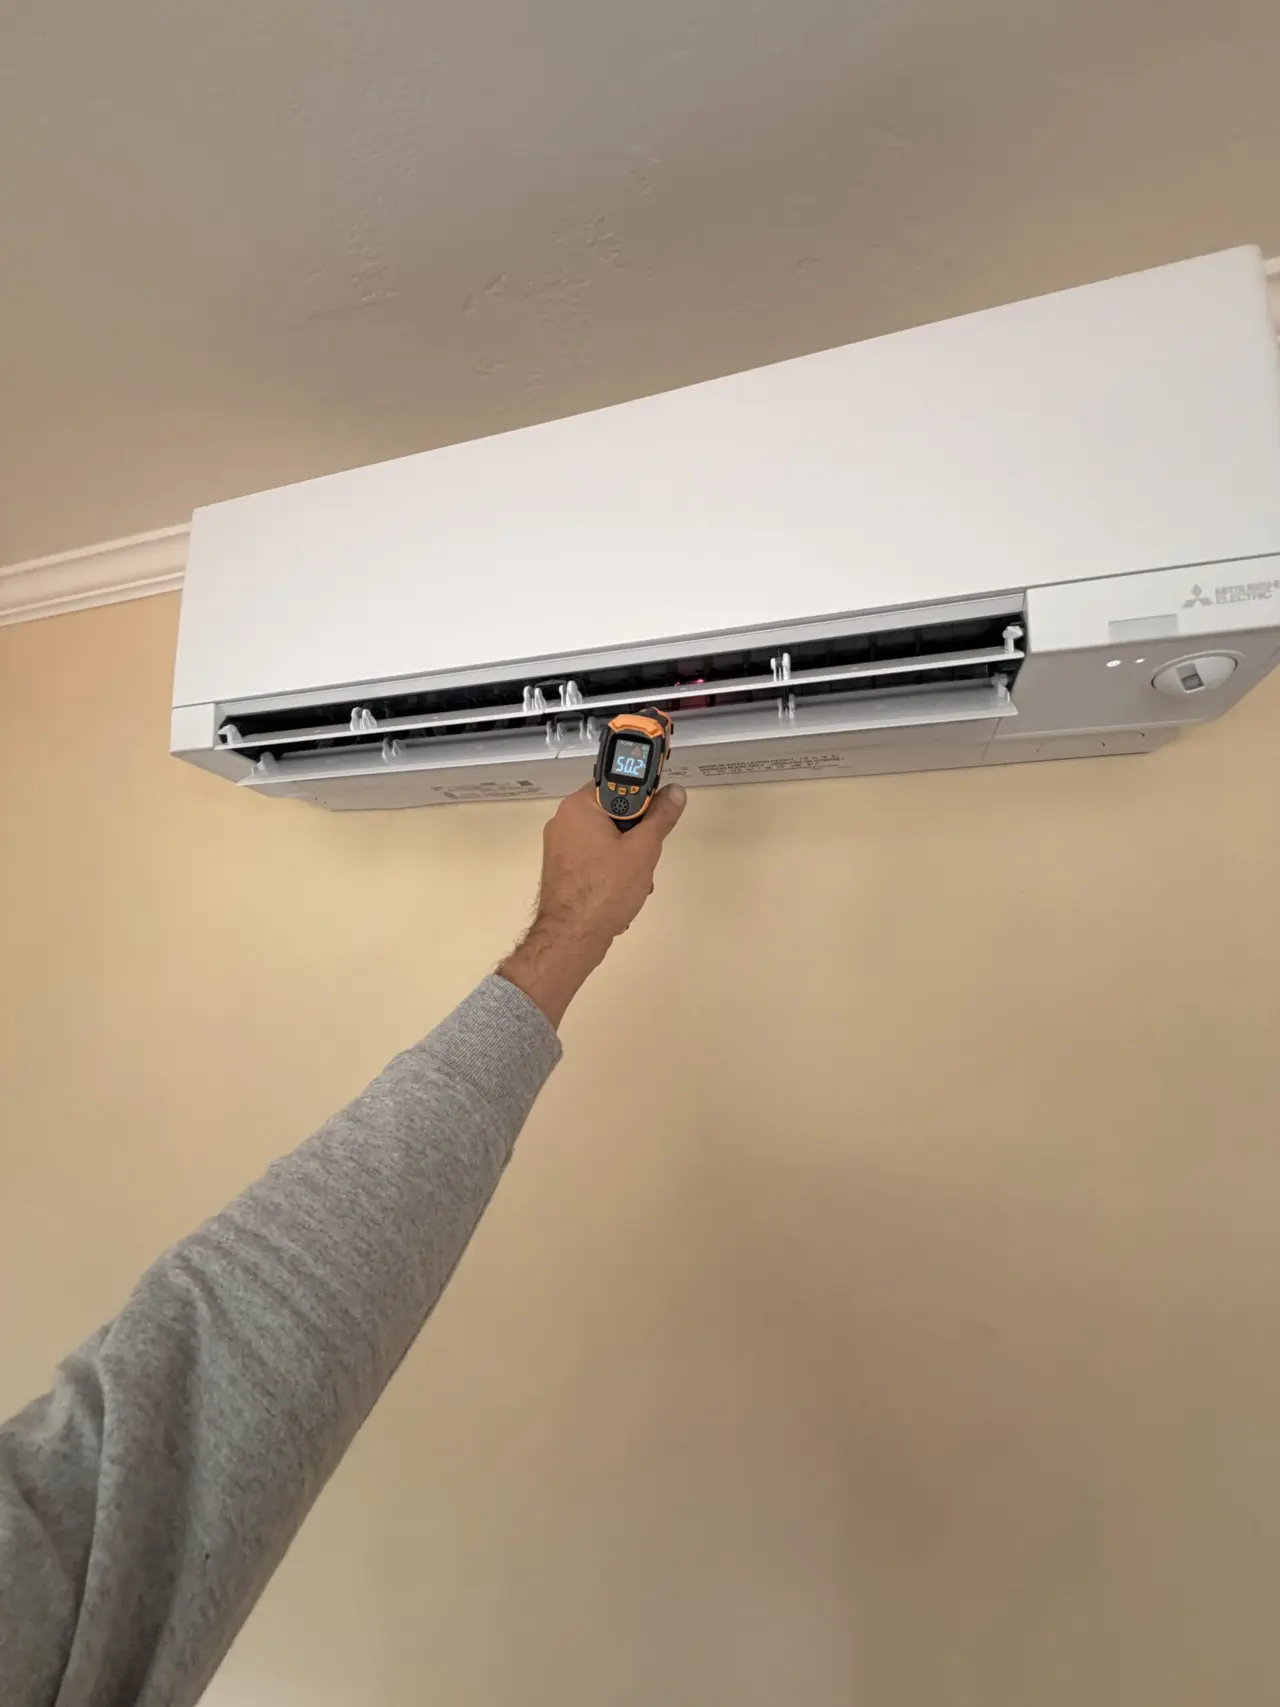
Mitsubishi MXZ-3D24NL heat pump and MSZ-FX06NL mini-split installation in Belmont, CA
We recently completed a Mitsubishi MXZ-3D24NL heat pump installation with multiple MSZ-FX06NL wall-mounted units in Belmont, helpi

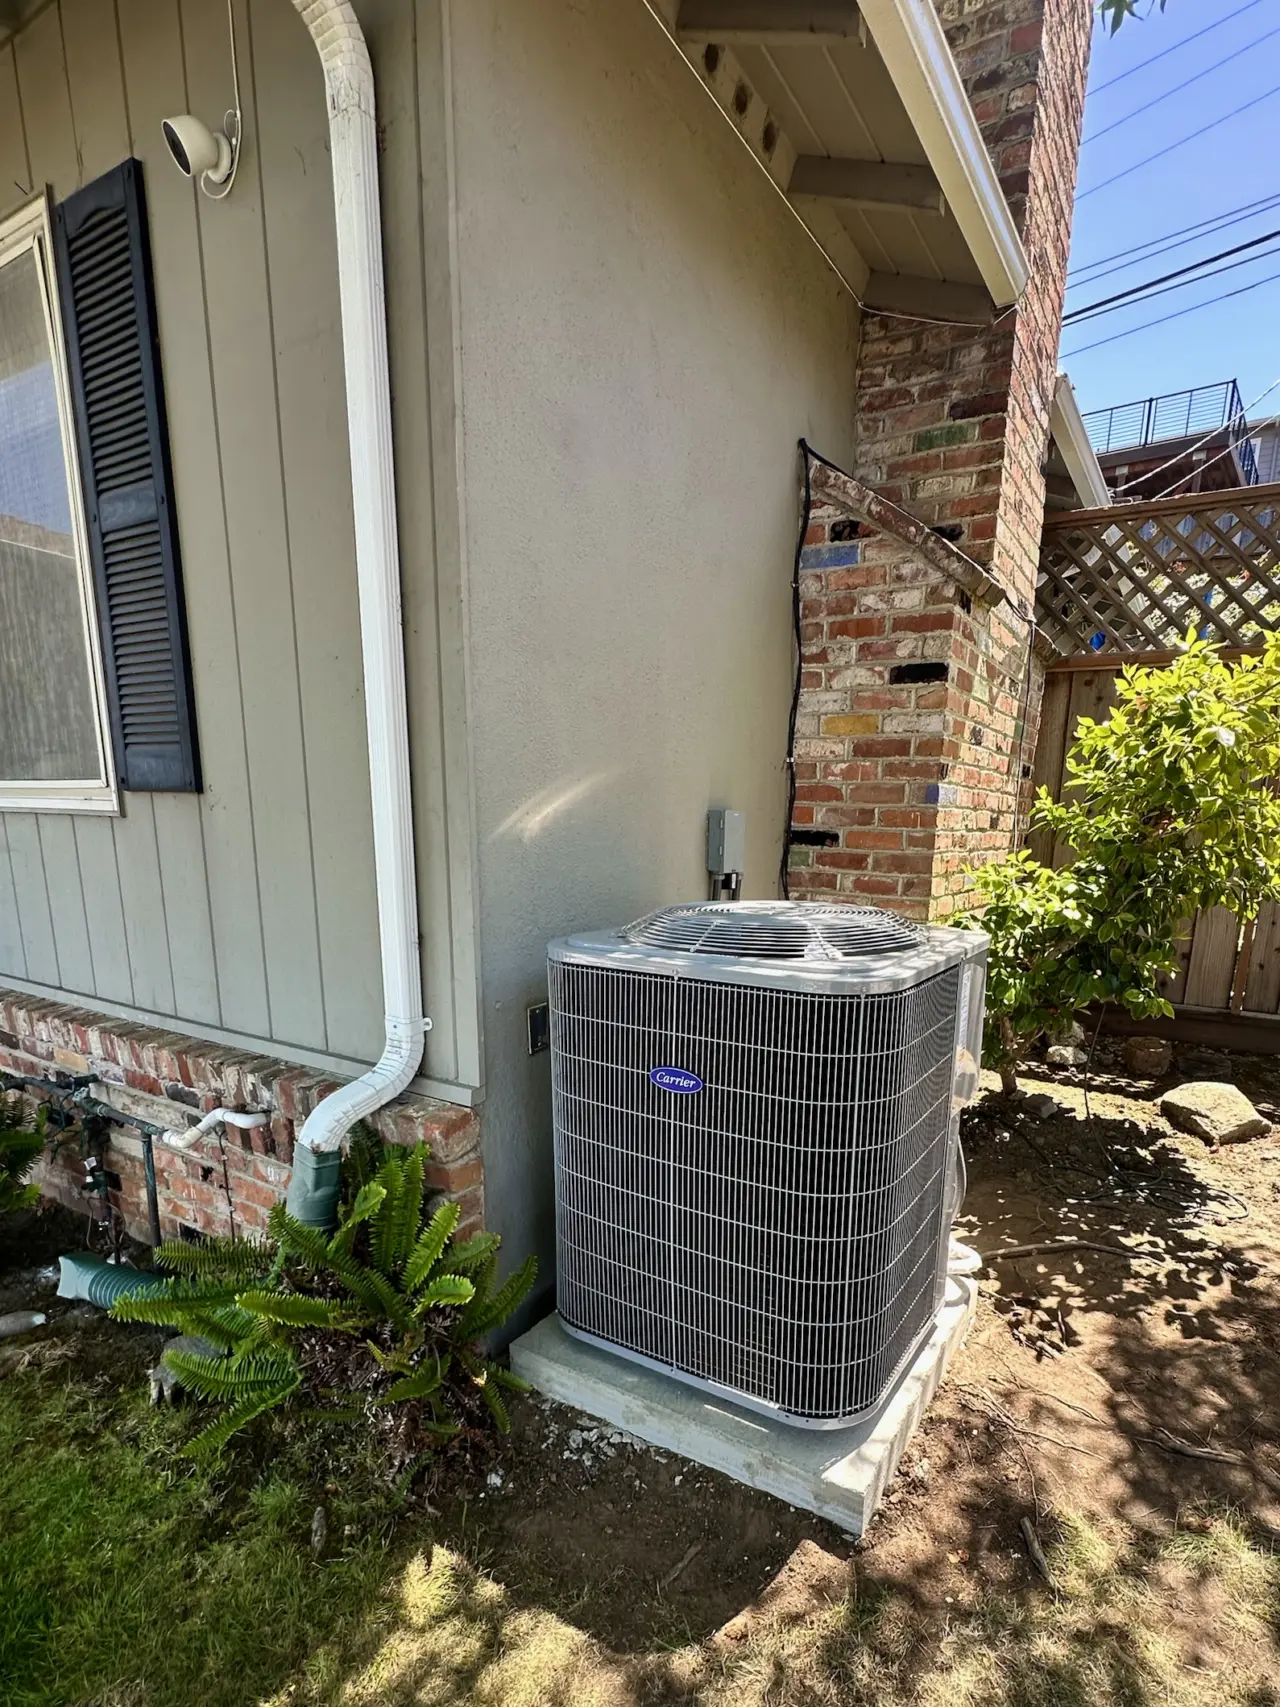
Carrier dual-fuel heat pump and furnace installation in San Mateo, CA
We recently completed a Carrier dual-fuel heat pump system installation in San Mateo, replacing an aging HVAC setup with a modern

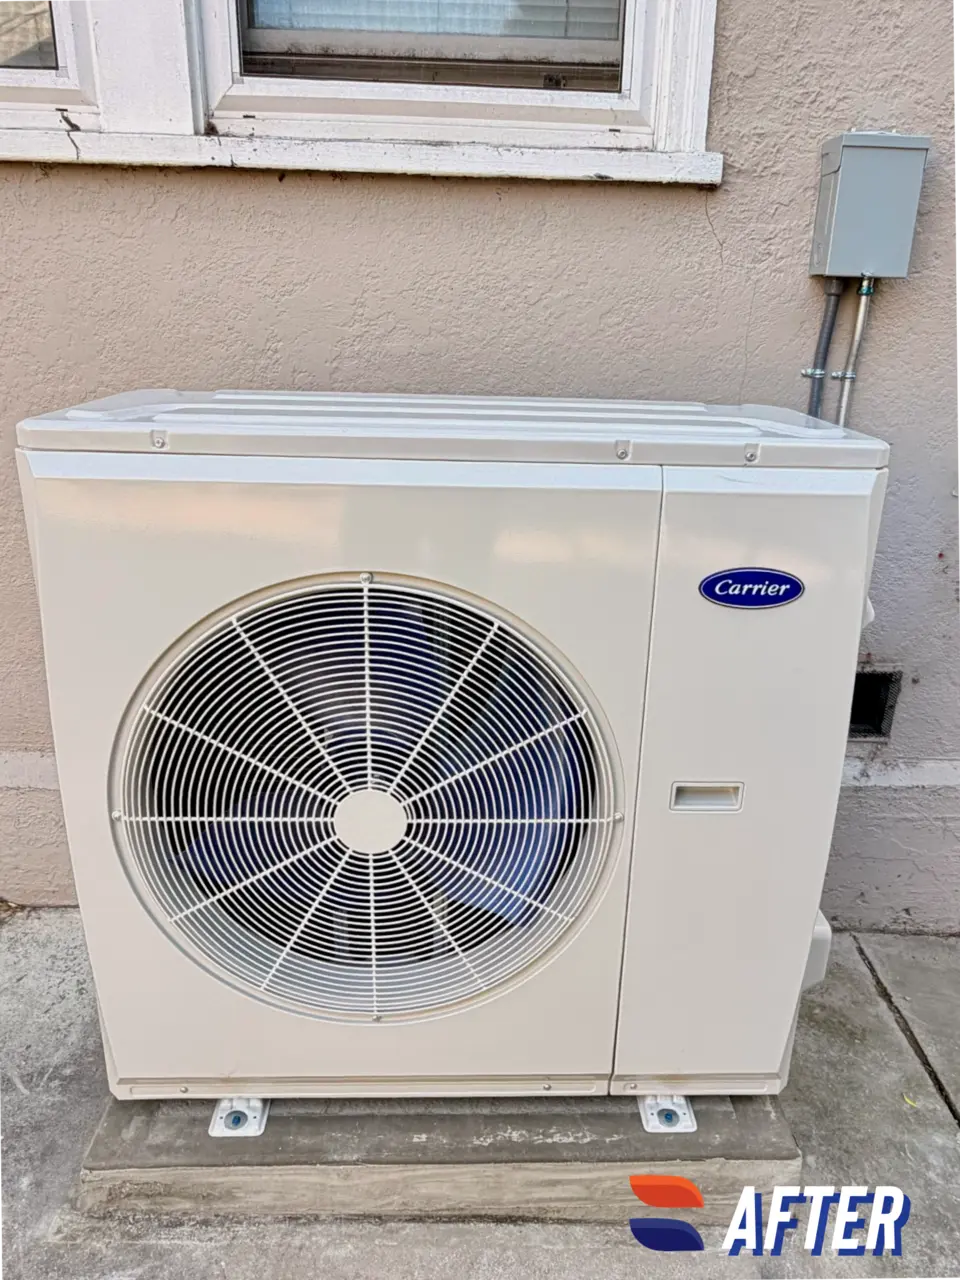
Carrier 37MUHAQ36AA3 heat pump installation
This San Carlos home traded an aging, noisy system for a Carrier 37MUHAQ36AA3 heat pump paired with a Carrier 45MUHAQ36XX3 air han
Need this done at your home?
Our certified San Mateo County technicians are ready. Book online in under a minute or give us a call.